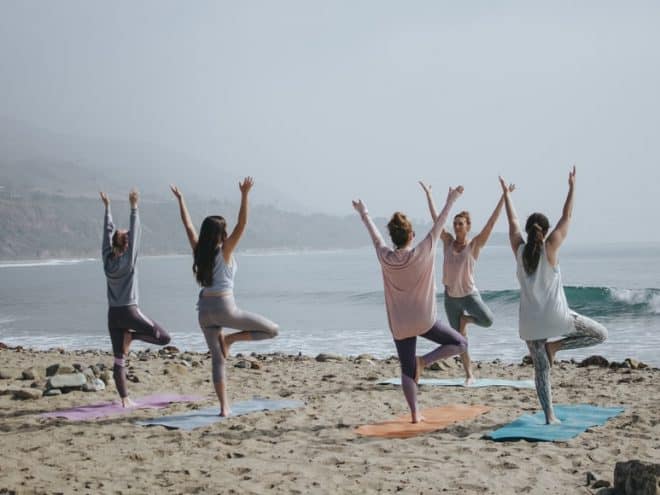
Yoga is useful for more than finding inner peace, it can also help you find your way into a smaller pant size. To create a routine that works for you check out these adaptable poses below:
Tree

Source: “Vriksasana Yoga-Asana Nina-Mel” by Kennguru
One of the best things about tree pose is that it can be modified for anyone’s practice, making it ideal for beginners. Never put your foot on the knee as this can cause injury.
- Begin standing in Samasthiti, shift your weight to one leg then bring the other leg up so that the sole of your foot is facing inwards. Choose your placement: sole of the foot against the ankle for beginners, against the calf or against the thigh for more advanced. You may pull your ankle to help move the leg up.
- Gently raise your hands above your head, making sure your fingers are reaching towards the ceiling. Turn your palms outward for a greater stretch in the arms and shoulders. Alternatively, you can put your hands in prayer at heart’s center.
- To come out of tree pose turned the raised leg forward and slowly lower it, followed by your arms.
- Repeat pose on the other side.
Baddha Konasana

Source: https://www.flickr.com/photos/lollyknit/2761360840/in/photolist
This is an ideal pose to go to if you find another pose is outside your practice, it’s a wonderful resting pose and is an excellent pose for pregnant yogis. Do not do if you have injured knees.
- Begin in Dandasana, take a deep breath and as you exhale reach forward to grasp your feet in your hands. If you have difficulty reaching your feet you may use a yoga strap placed on the balls of the feet to improve your reach.
- Pull your feet towards your pelvic bone, knees bent with the soles of the feet touching one another.
- Variations: Supta baddha konasana is a reclined version of this pose. Lie on your back and bring the soles of the feet to touch, as close to your body as is comfortable. You should feel a mild stretch in the thighs when doing this pose, but it shouldn’t be painful.
Bridge

Source: https://www.flickr.com/photos/adrianv/4157275393
Do not do if you have an injured neck or back.
- Lie on your back on the floor, bending your knees and setting your feet on the floor, heels as close to the sitting bones as possible.
- Exhale, pressing your arms and feet into the mat, pushing your tailbone upwards toward the pubis.
- Lift your buttocks until your thighs are about parallel to the floor, keeping your knees directly over the heels.
- Exhale and release, slowly rolling the spine back towards the mat.
- More advanced practice: Clasp your fingers together just below where your back raises for an added stretch.
Upward Facing Dog
 Source: http://www.freestockphotos.biz/stockphoto/16316Upward Facing Dog pose is chest opening pose that will put your arms to work.
- Lie on your stomach on the floor, stretch your legs back and rest the tops of the feet on your mat.
- Spread your hands on the floor, under your shoulders with elbows tucked in towards the body, not splayed out.
- Press the tops of the feet, your thighs and your pubis firmly into the mat.
- Inhale and begin to straighten your arms to lift your chest from the mat. Keep the pubis and thighs in contact with the surface if you are just starting out. Lift the pubis and thighs from the mat and rest only on the tops of the feet for a more advanced version.
- Exhale, releasing back to the floor.
Utkatasana (Chair Pose)

Source: https://commons.wikimedia.org/wiki/File:Utkatasana_Side_View.jpg
The announcement of chair pose always sent a groan through the class, which is a sign of how much exercise this pose truly is.
- Stand straight with toes, heels and ankles to touch. Beginners may stand with their feet hip distance apart, and anyone with back injuries should also take the hip distance pose.
- Inhale, raising your arms above your head, perpendicular to the floor — or put hands in prayer at hearts center.
- Exhale as you bend your knees, bringing your thighs parallel to the floor.
- Draw your shoulder blades back, and shift your weight to your heels — allowing you to sink lower into your chair.
- To exit this pose inhale as you straighten your legs, lifting through your arms. Exhale and release back into your standing pose.
Downward Facing Dog

Source: https://commons.wikimedia.org/wiki/File:Downward-Facing-Dog.JPG
- Starting on hands and knees with a neutral spine, set your knees hip distance apart with toes tucked and your fingers spread wide on the mat — hands placed slightly forward of the shoulders.
- Exhale and lift your knees away from the floor.
- Push your thighs back and reach your heels towards the mat, coming as close to flat as is comfortable. Straighten the knees but be sure not to lock them. Roll the thighs inward slightly.
- To come out of this pose exhale and slowly lower back onto your hands and knees.
- Find a restorative pose after, such as child’s pose to relax.
Half Pigeon Pose

Source: https://www.flickr.com/photos/jill_r/8740954081
Half Pigeon is a great hip opener and an overall fantastic stretch.
- Starting on hands and knees with a neutral spine push up and back into downward facing dog.
- Once stable in this pose, slowly lift one leg out behind you and stretch it as far as is comfortable for you. Bring the leg forward, under your body turning it to face your pelvic bone, as the standing leg slides out straight behind you.
- Ease into this position as far as is comfortable for you.
- Repeat pose on the other side.
Remember that discipline isn’t about beating yourself up, it’s about putting focus into your work. Never try to push yourself outside of your practice, your body will adjust to the poses in time. With patience and hard work you can achieve a happier and healthier lifestyle, and make lasting changes to your body and mind.

